Tuesday, August 28, 2007

Raspberry Ice-Cream Cake for the dog

Today is THE day for my dog - it's her 8th year old birthday! Almost every year, I would celebrate this day for her with a cake. Previously, I was not aware that chocolates can be poisonous to dogs*, so I brought her a chocolate cake (being my all-time favourite) and I guess I'm lucky to still have her alive and kicking. Then again, maybe I ate most of the cake so that explains why she's not murdered by me then.

*An extraction from an article explains that chocolate contains theobromine, an alkaloid that dogs can't metabolize quickly. If a dog ingests a large amount of chocolate, the theobromine can build up and reach a toxic level of concentration, leading to cardiac arrest. Different types of chocolate are more harmful than others, and the effects will vary, depending upon the size and weight of the dog. However, it is potentially lethal.

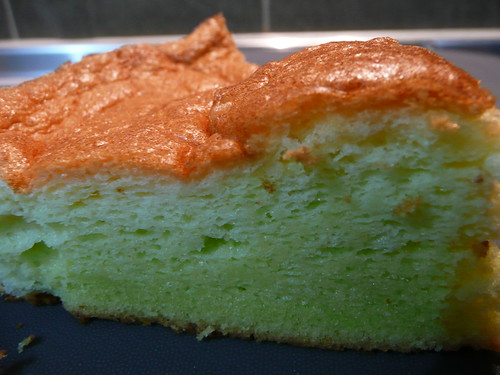
So this year, I decided to bake her a cake! And to sort of reduce the possibility of failure, I chose to make the relatively simplier Ice-Cream cake.


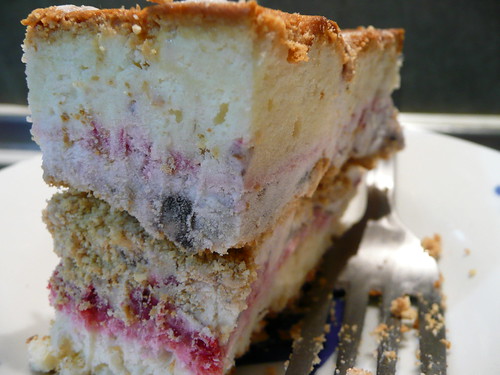
RASPBERRY ICE-CREAM CAKE


Ingredients:

1.5 cups cake flour
1 tsp baking powder
1/4 tsp salt
3/4 cup unsalted butter, at room temperature
1 cup + 1 tbs granulated white sugar; separate I put less quantity of each
1/2 tsp pure vanilla extract
1/2 cup milk
4 large egg whites
1/4 tsp cream of tartar
5 cups vanilla ice-cream I used blueberry ice-cream instead
1+1/2 cups fresh raspberries, lightly crushed
1 small packet of digestive biscuit (decided to improvish a little)

Method:
(1) Preheat oven to 180°C and place rack in center of oven. Grease and line with parchment paper an 8" square cake pan. Set aside.

(2) In a mixing bowl, sift the flour, baking powder and salt. Set aside.

(3) In electric mixer bowl, beat the butter until soft (~ 1-2 mins). Gradually add 1 cup sugar and beat until light and fluffy (~ 2-3 mins). Add vanilla extract and beat until combined.

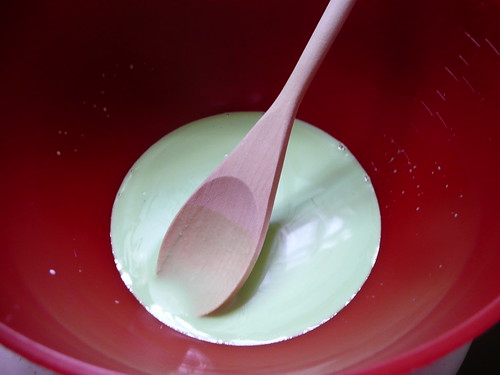
(4) Add flour mixture and milk, in 3 additions, beginning and ending with flour. (I think by not following this sequence, I still got quite a nice cake)

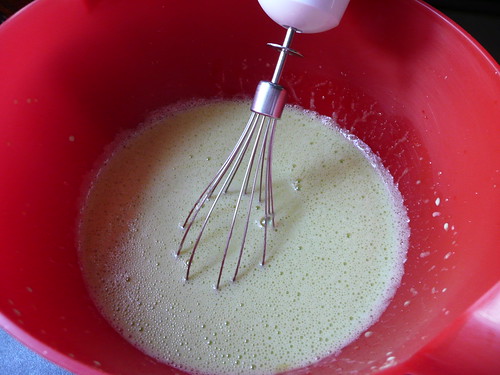
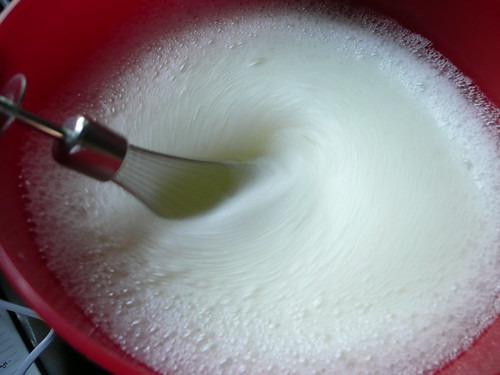
(5) In a clean bowl, beat egg whites until foamy. Add cream of tartar and continue beating until soft peaks form.

(6) Gradually add remaining 1 tbs of sugar and continue to beat until stiff peaks form.

(7) With a rubber spatula, gently fold a little of the whites into the batter to lighten it and then fold in remaining whiltes until combined. Do not overmix or it will deflate. (I used a large metal spoon instead)

(8) Pour batter into pan and smooth the top with an offset spatula. Bake for approximately 30 mins, or until toothpick inserted comes out clean. (I just used the same metal spoon to smoothen the top of the batter)

(9) Cook cake on wire rack for ~ 10mins. Remove cake from pan and leave to ool completely.

(10) Using a serrated knife, cut cake horizontally into two layers. Place one layer onto the bottom of a clean 8" pan that has been lined with plastic wrap.

(11) Lightly crush raspberries and spread them over top of cake.

(12) Let the ice-cream soften until it is spreadable and spoon the ice-cream evenly on top of raspberries. Cover with second cake layer. (my own creation: after adding the ice-cream layer, I topped it with the crushed digestive biscuits. Then I added another layer of ice-cream before covering it with the second cake layer)

(13) Press down to compact the cake, ice-cream and berries and then cover with plastic wrap.

(14) Freeze for at least an hour.

(15) About 30 mins before serving, take cake from freezer and remove it from cake pan.


Verdict:
(+) If you got the cake right, what else can go wrong??
(+) Such cake (to be stored in freezer) can be kept longer without much compromise to the flavour and texture of the cake.
(+) Suprisingly, the cake turned out to be not too sweet!

(-) I should have mixed abit of the ice-cream with the biscuit crumps because the cake keeps separating at the dry biscuit crump layer

(-) Should add more ice-cream to have the more shiok taste!

(=) The dog likes it! That is what's important!


Sunday, August 26, 2007

Fettuccini Ham Sauce & Fishball Tofu Soup dinner

Yesterday evening, I put my culinary "skills" to the test again. I made Fettuccini with Ham Sauce and Fishball Tofu soup for dinner.


FETTUCCINI WITH HAM SAUCE


Ingredients:

150g fettuccini
15g diced green pepper
15g diced onion
15g diced tomato
15g sliced mushroom
20g sliced ham
1 egg
20g olive oil
30g chilli sauce I left this out
30g tomato sauce
pinch of aromat seasoning powder I left this out
20ml chicken stock

(I did not follow the quantities stated in the recipe. It's all Ah-Gah-ration!)

Method:
(1) Mix the chilli sauce, tomato sauce, aromat seasoning powder and chicken stock. This will be the sauce for the fettuccini. Leave aside.

(2) Cook fettuccini and rinse with cold water.

(3) In a wok, heat up the olive oil.

(4) Add egg and fry slightly before adding all the other ingredients.

(5) Pour in the sauce and fry for a while.

(6) Add the fettuccini and stir fry for a while.

(7) Sprinkle oregano leaves as a finishing touch


Verdict:
(+) Easily done and produces a rather edible pasta dish. Tastes not too bad actually.
(+) Extremely low fat dish and very filling.

(=) A good alternative to cooking pasta with off-the-shelf pasta sauce.


FISHBALL TOFU SOUP


Ingredients:

1 packet tofu
fishballs, quantity up to individual's appetite
half chicken stock cube


Method:
(1) In a pot of boiling water, add the chicken stock cube.

(2) With the tofu still in the plastic container, dice it into rectangles with a knife.

(3) Add the fishballs and tofu.

(4) Once the fishball floats to the surface of the soup, it is ready to serve.


Verdict:
(+) Oil-free, light soup
(+) Can add bak-chor (seasoned minced pork) to make the soup more filling.

(=) Soup is ready in 10 minutes. A healthy alternative to those powder ready soup mixes.


My mom will be away from home for a month which means that there'll be more "opportunities" for me to display my culinary "skills". I think with her absence, we'll surely learn to appreciate the hardwork she has put into the family!


Friday, August 24, 2007

Hotdog combo meals @ Sausage Co.

After the visit at the hospital, I decided to meetup with some friends for hotdog dinner @ Sausage Co.

It was raining rather heavily when we reached the shop and found, to our surprise, a small queue already forming outside the shop.


I ordered a Bockwurst with lettuce, tomato and chilli beef toppings. The chilli beef is a teeny bit spicy but nevetheless, nice! I was being very greedy and attempted DIY hotdog where I topped a very large scoop of beef chilli! Yummy!


My friends ordered a Mushroom Frankfurter each but with different toppings. One with chilli beef and honey mustard toppings


while the other chose lettuce, chilli ebi and honey mustard toppings. My friend especially enjoyed the chilli ebi because it is unique to have it served on a hotdog - plus it is also homemade. All three hotdogs were given the thumbs-up!

Each hotdog costs $5 and we ended up paying another $1.50 as top-up to one combo meal where we had a peach tea and a small salad bowl.


It was quite an experience to have a pipping hotdog in hand, standing under a shelter in the cool evening, with the heavy downpour pounding just 4 metres away on the gravel road.

Thursday, August 23, 2007

Pandan Chiffon Cake

This morning, I caught the baking bug once more. So I rushed off to Poon Huat at Toa Payoh and bought some ingredients. Decided to bake a Pandan Cake and bring it along as a snack for my brother and sister-in-law when I visit Alicia in the hospital.


PANDAN CHIFFON CAKE

Ingredients:

8 eggs
1+1/4 cups granulated sugar I used only 1 cup sugar
3/4 cup liquid vegetable oil
1 tsp vanilla extract
3/4 cup coconut milk
1/4 tsp pandan extract I used pandan flavour instead which is a clear liquid
1/4 tsp green food colouring
1 cup self-rising flour or cake flour I used cake flour
1+1/2 tsp baking powder (add only if using cake flour)
1/2 tsp salt (add only if using cake flour)
1/2 tsp cream of tartar

Method:

1. Preheat oven to 180°C.

2. Separate egg into egg yolks and egg whites.

3. In a small bowl, combine coconut milk, pandan extract, green food colouring. Set aside.

4. With mixer, beat egg yolks, sugar, oil, vanilla extract until well combined.

5. Beat in coconut/pandan extract mixture.

6. Sift and combine flour, baking powder and salt.

7. Make a well in center of dry ingredients and whisk egg mixture into flour mixture.

8. Beat egg whites till frothy. Add cream of tartar and beat until firm peaks form.

9. Fold the beaten egg whites into the flour/egg yolk mixture.

10. Gently pour batter into an ungreased 9" or 10" tube or pan. Spread batter to even out top.

11. Bake for 45 minutes or until cake feels spongy to the touch.

12. Remove cake from oven and carefully invert pan onto a cooling rack. Do not remove cake from pan until completely cooled.

13. Once cake has cooled, ran spatula around sides to release cake.


Verdict:
(-) do not have much of the pandan fragrance maybe I should use another type of pandan flavoring which is thicker and green in colour; so I can do away with the green colouring. My mom suggest that perhaps i should try to squeeze the juice from the actual pandan leave (!)
(-) Nice and bloated when baking but somehow collapses after cooling.

(+) cake is really light and fluffy
(+) Not too sweet
(+) Effort is well appreciated :)

(=) Will make a second attempt


Nice to Meet You!

We welcome a new member to our family - Alicia!
She was born today at 2:38pm, Mt. Alvernia Hospital and weighs 3.795kg with length 51cm.


Tuesday, August 21, 2007

Advertisement: Sausage Co. Hotdog @ Icon Village

This is a small Hotdog shop located at the ground level of yet another new condominium in Singapore. And it's owned by someone of blood relation, so it's only right that I put up a tiny advertisement here.

The business is about 6-7 weeks old and the menu is currently being fine-tuned in response to feedbacks from the customers; which means

- if something tastes dull the first time, there might have already been an improvement meanwhile(!)

- new add-ons to the menu upon popular requests; in another words, the customers have a say in changing the menu (!!)


I shall be posting photos of the hotdogs sold there soon!

Meanwhile, The Travelling Hungryboy and the Eat-Drink-Man-Woman thread from the Hardwarezone form has already blogged about the shop !


How to get there:

Nearest MRT is Tanjong Pagar station. Icon Village located next to Amara Hotel. The shop is just by the roadside.

Monday, August 20, 2007

Equipments Fret-Me-Not

Before I commence on my experiment to check the reproduceability of recipes from the web - (do they really produce the yummy-licious food as shown in the photos?), I thought to emphasize on how useful it is to use measuring cups and spoons when trying to recreate most of the baking recipes.

They are so inexpensive, easily found in supermarkets and yet such a GREAT help!

So I hereby proudly present my weiss measuring cups:


and my rot measuring spoons *tah-dah*:


The US measurement units comes in cups, teaspoons, tablespoons ...etc while the Metric measurement units comes in grams and millilitres. Personally, I prefer the US units. I just need to make sure the flour or sugar cover the cup nicely. Afterall, cooking is all about "Ah-Gah-Ration". That's what my grandma and mother used to and always tells me. :)

If I happen to chance upon some really good makan - be it here in Singapore or abroad, I'll definitely be posting the photos!

So till then, my adventure begins....